Category

Mural Guides & How-To

Practical guides and how-to advice for planning, painting and maintaining murals.

How to Paint a Mural: A Beginner’s Guide

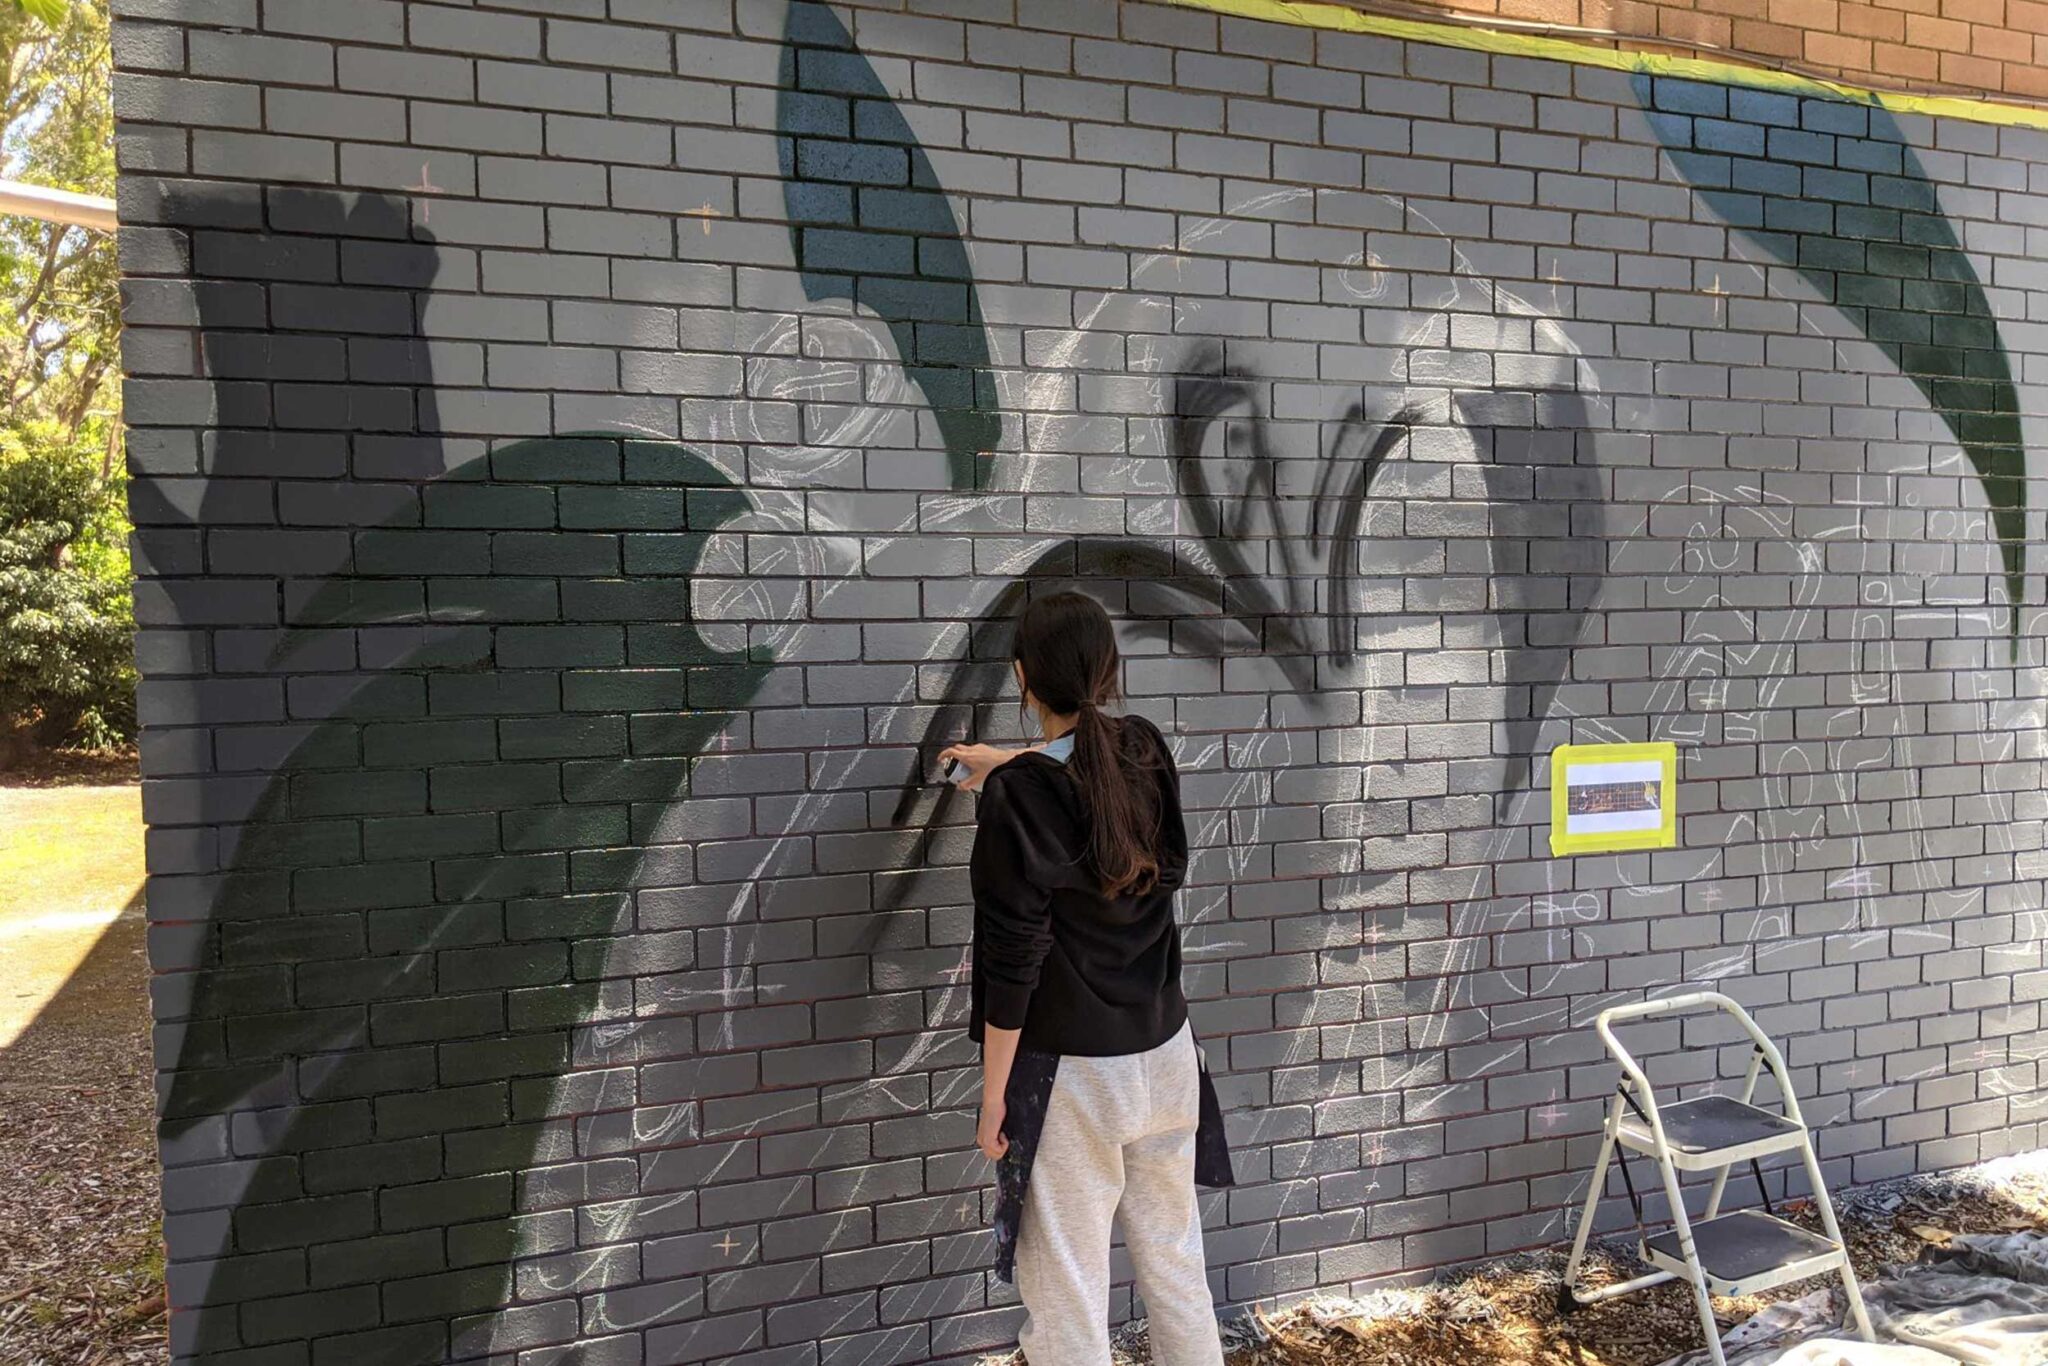
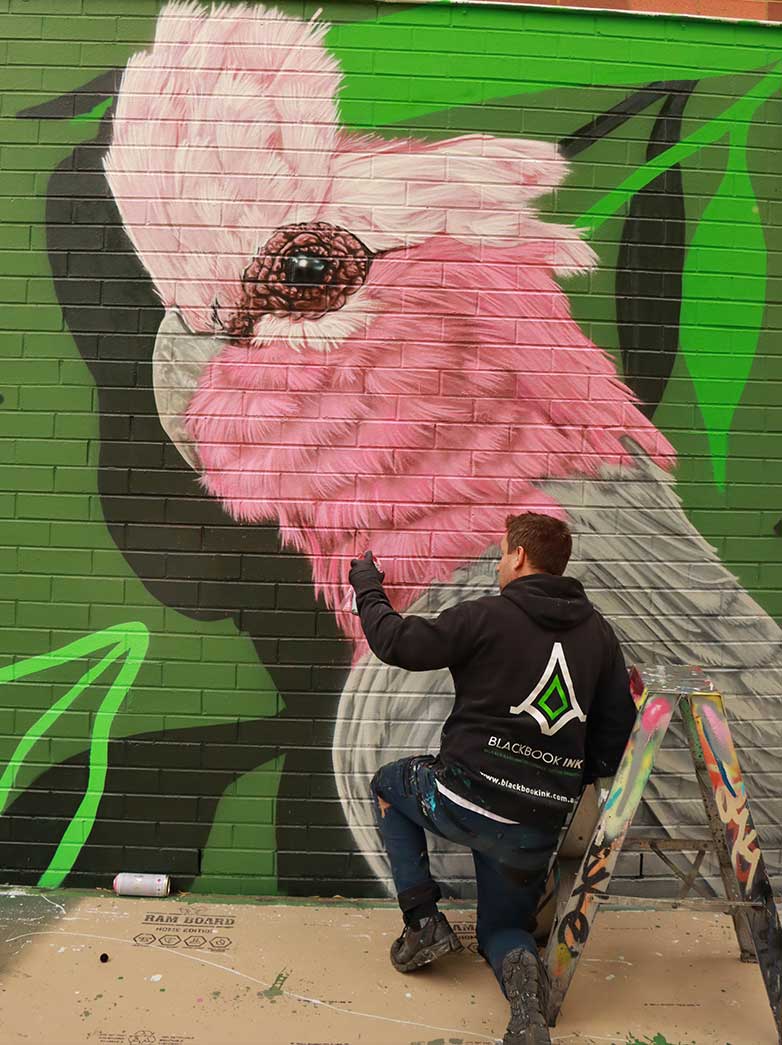
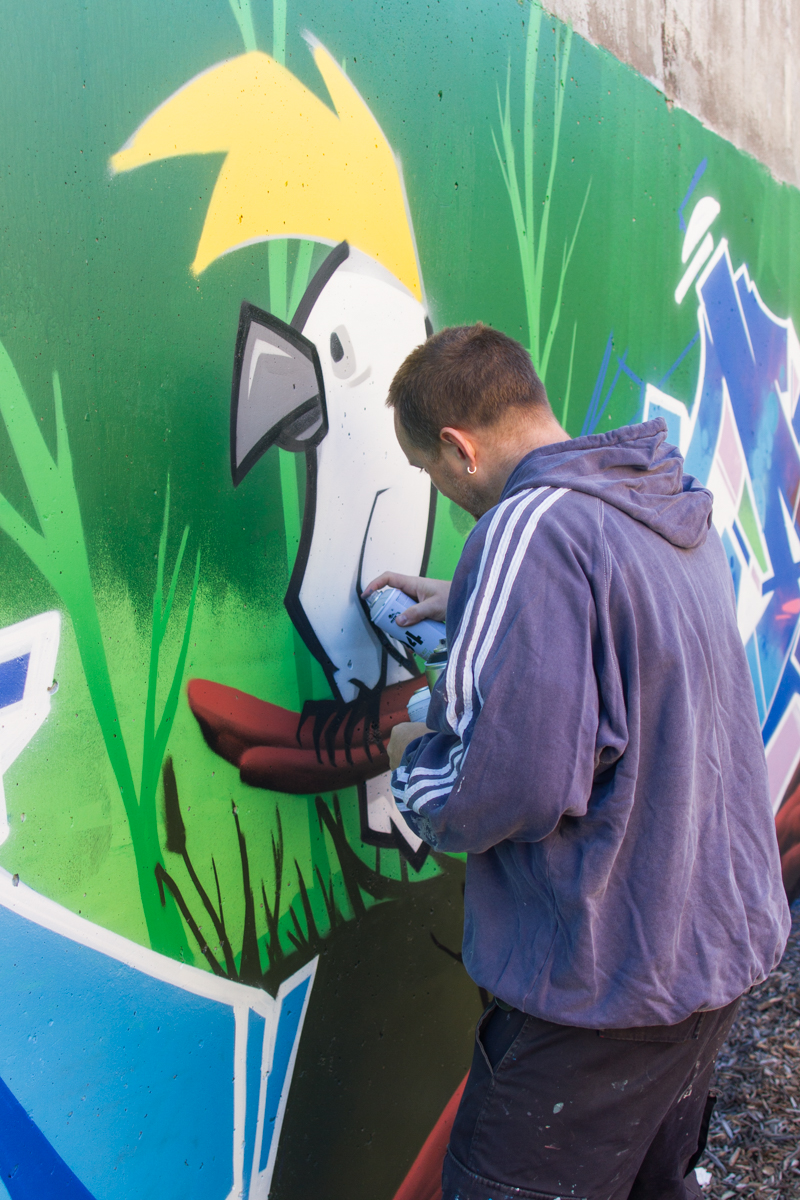
Artist creating graffiti art on brick wall at Blackbook Ink.

Learning how to paint a mural can feel overwhelming at first, especially if you are working on a large wall, using new materials or trying to scale up a design from paper to a full mural.

The good news is that mural painting becomes much easier when you break the process into clear steps.

Whether you are painting a small feature wall at home, a community mural, a school project or your first outdoor wall, the same basic process applies: plan the design, prepare the surface, scale the artwork, paint in stages and protect the finished mural.

This beginner’s guide explains how to paint a mural step by step, including what materials you may need, how to transfer your design onto a wall and what to think about before you start painting.

At Blackbook Ink, we have painted hundreds of murals across Australia for schools, councils, businesses, homes and public spaces. This guide is designed to help beginners understand the basics before starting their own mural project.

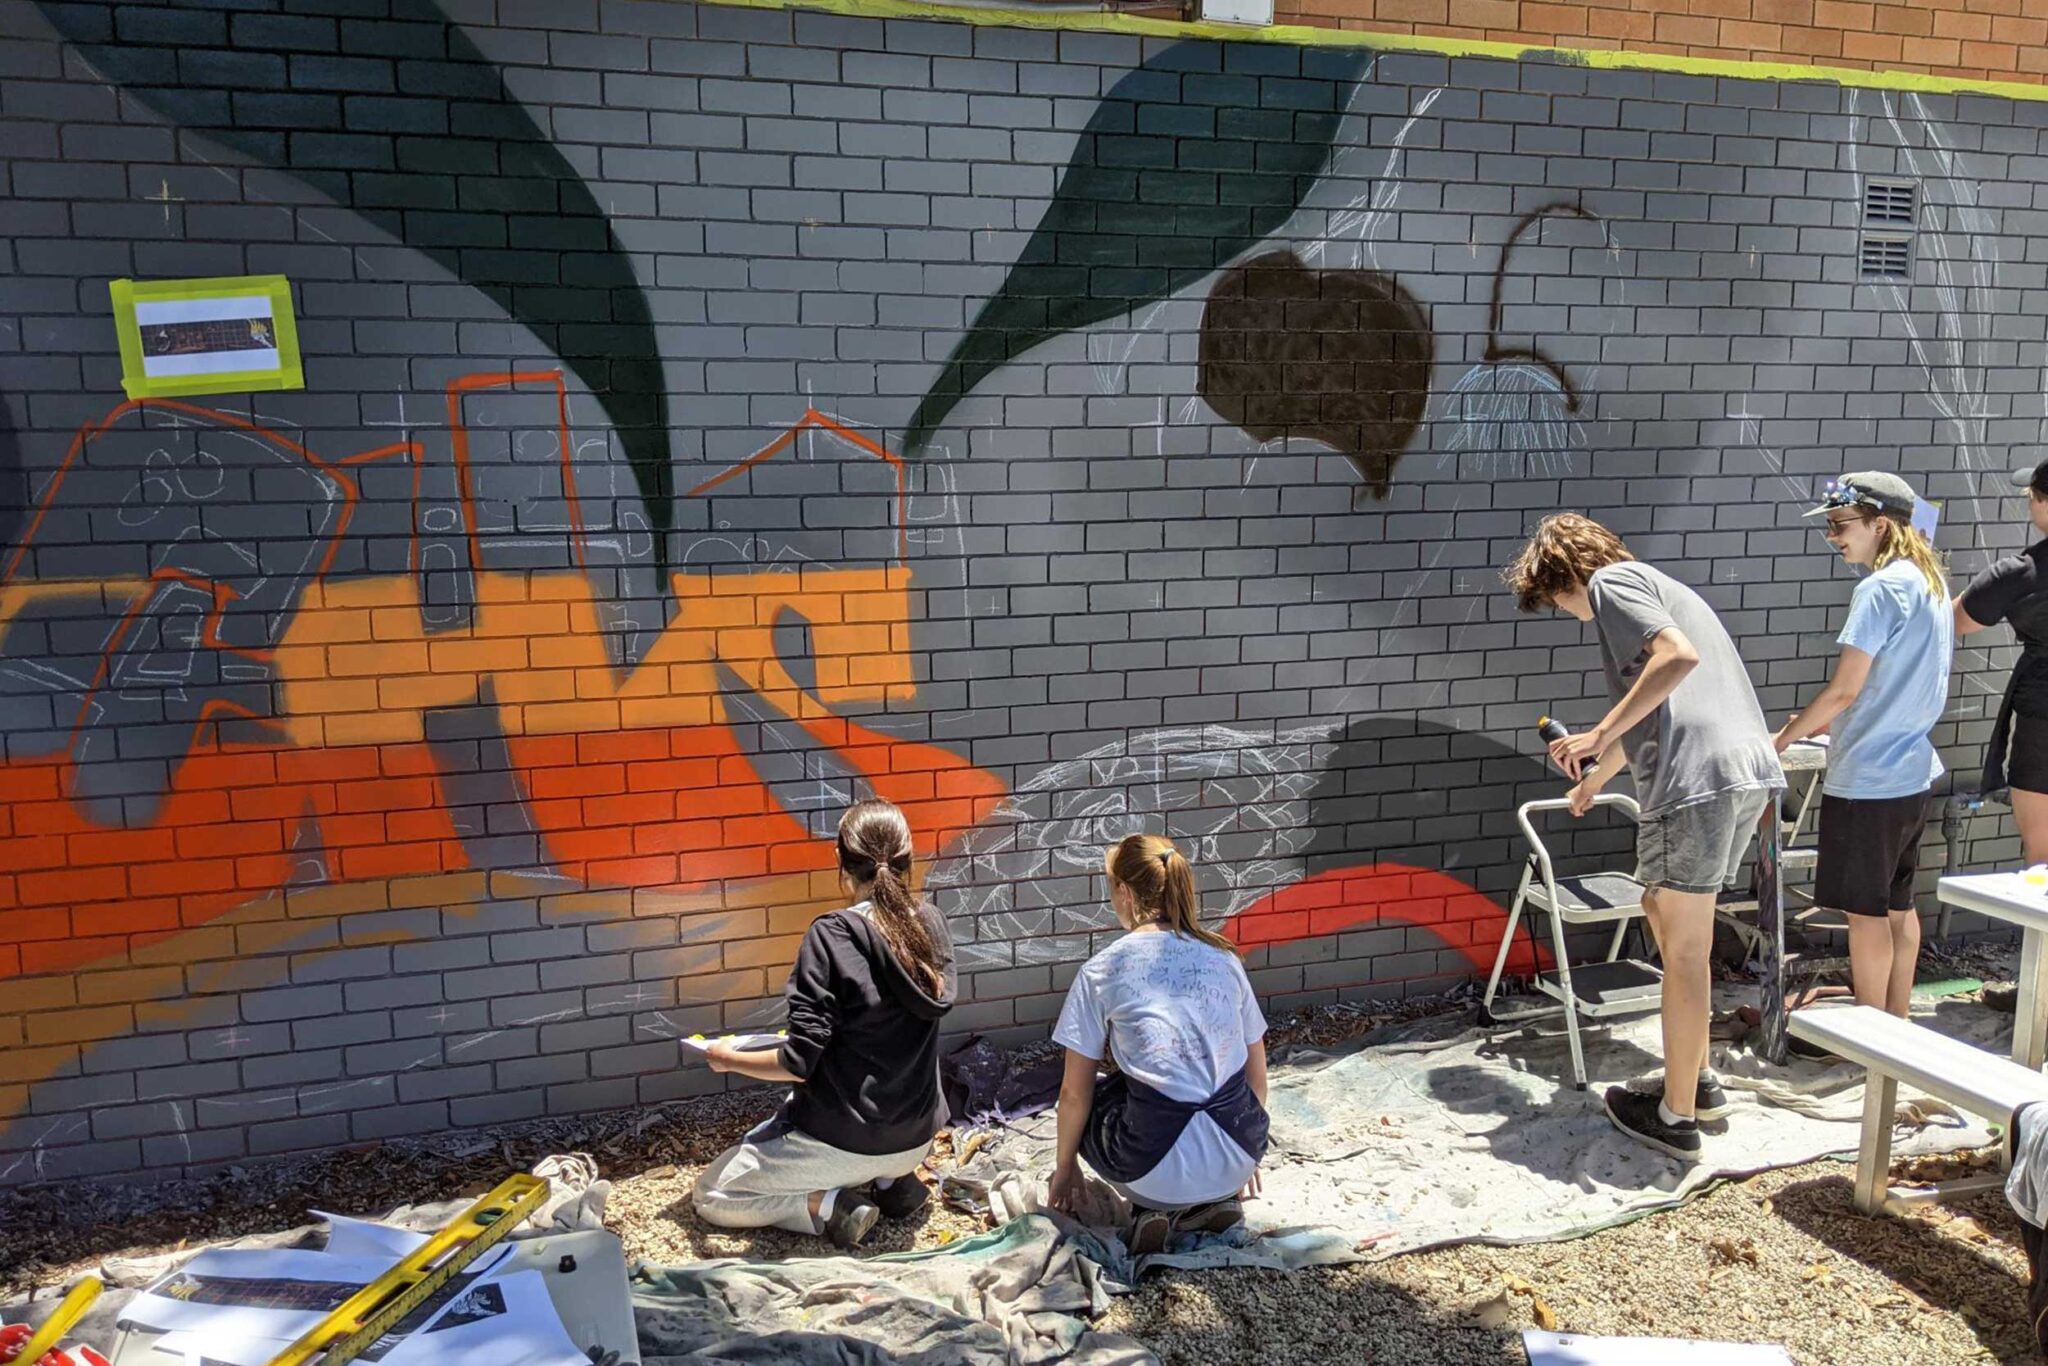
Artists creating vibrant graffiti mural on brick wall at Blackbook Ink.

What Is a Mural?

A mural is an artwork painted or applied directly onto a wall, ceiling or large surface.

Murals can be created indoors or outdoors and can range from simple shapes and patterns through to detailed illustrations, realistic portraits, landscapes, graffiti art or large-scale public artworks.

Unlike a canvas painting, a mural needs to work with the wall itself. The size, surface, location, lighting and viewing distance all affect how the artwork should be designed and painted.

This is why planning is one of the most important parts of mural painting.

What Do You Need to Paint a Mural?

Before you start painting, it helps to organise your materials.

What you need will depend on the size of the mural, the surface and whether it is indoors or outdoors, but most beginner mural projects will need a version of the following:

  • Painter’s tape
  • Drop sheets
  • Pencils, chalk or paint markers
  • A tape measure
  • A level or ruler
  • Primer or undercoat
  • Exterior or interior wall paint
  • Acrylic paint or spray paint
  • Paint brushes
  • Rollers and trays
  • Water buckets or cleaning materials
  • Rags or paper towel
  • Ladder or step platform
  • Clear protective coating if needed

For larger murals, you may also need scaffolding, an elevated work platform, spray equipment, respirators, safety barriers or traffic control depending on the location.

For beginner projects, start small. A simple feature wall, bedroom mural or low-height garden wall is much easier to manage than a large outdoor commercial wall.

Step 1: Choose the Right Wall

The first step in learning how to paint a mural is choosing the right wall.

A good mural wall should be stable, clean, dry and suitable for painting. Avoid surfaces with major cracking, peeling paint, water damage, mould or loose render unless they can be repaired first.

Before starting, check:

  • Is the wall indoor or outdoor?
  • Is the surface smooth, brick, concrete, render, timber or metal?
  • Is there existing paint on the wall?
  • Is the wall exposed to direct sunlight or rain?
  • Can you safely reach the full area?
  • Do you have permission to paint it?

The surface will affect what preparation, primer and paint system you need.

Step 2: Plan Your Mural Design

A successful mural starts with a clear design.

Before painting directly on the wall, sketch your idea on paper or create a digital mockup. This helps you work out the composition, colours, proportions and main elements before committing paint to the surface.

For beginners, simple designs are usually best. Large shapes, bold colours and clear outlines are easier to paint than highly detailed realism.

When planning your mural, think about:

  • What is the purpose of the mural?
  • Who will see it?
  • How far away will people stand when viewing it?
  • What colours suit the space?
  • How detailed does it need to be?
  • Will it include text, logos or characters?
  • Does the design suit the size and shape of the wall?

A design that looks good on paper may need to be simplified when scaled up to a large wall.

Step 3: Prepare the Wall

Wall preparation is one of the most important parts of mural painting.

Even the best artwork will struggle to last if the surface is dirty, dusty, damp or flaking. Preparation helps the paint bond properly and creates a cleaner surface to work on.

Basic wall preparation may include:

  • Cleaning dust, dirt or cobwebs from the wall
  • Removing loose or peeling paint
  • Filling small holes or cracks
  • Sanding rough edges
  • Washing greasy or dirty areas
  • Allowing the wall to dry completely
  • Applying primer or undercoat if needed

Outdoor walls often need more preparation than indoor walls because they are exposed to weather, moisture and dirt.

If you are painting a wall with mould, damp problems or major structural issues, fix those problems before starting the mural.

Step 4: Prime or Base Coat the Wall

A primer or base coat helps create an even surface and can make your mural colours look cleaner.

If the wall is bare brick, concrete, render, timber or an uneven colour, a primer or base coat is usually recommended. For outdoor murals, use products suitable for exterior surfaces.

A base coat can also help cover old marks, patchy paint or strong colours underneath.

For most murals, a light neutral base colour works well because it gives you a clean surface to sketch and paint on. White, off-white or light grey are common options, depending on the final design.

Allow the base coat to dry properly before transferring your design.

Step 5: Transfer Your Design Onto the Wall

Once the wall is prepared, the next step is getting your design onto the surface.

There are several ways to do this:

Grid Method

The grid method is a simple option for beginners.

Draw a grid over your design, then draw a matching larger grid on the wall. Copy each square one at a time. This helps keep proportions accurate when scaling up.

Projector Method

A projector can be used to project your design onto the wall so you can trace the outlines.

This is useful for indoor murals or night-time work, but it may not be practical in bright outdoor conditions.

VR Headset Method

Another option is to use a VR headset, such as a Meta Quest 3, with mural layout apps like Contour or Stencil VR.

This method can help you view your design over the wall and trace the layout at scale. Instead of relying only on a projector, a VR headset can allow you to see your artwork positioned in the space while you mark out the main shapes, proportions and outlines.

For mural painting, this can be useful when:

You are working in a space where a projector is hard to position
The wall is too large for a standard projector setup
You want to check scale and placement before painting
You need to transfer outlines, lettering or composition guides
You want a more flexible way to place artwork onto the wall

VR can be a helpful tool, but it is still only a guide. You still need to check measurements, step back from the wall regularly and make adjustments by eye. Lighting, headset alignment and wall shape can affect how accurate the overlay appears.

For beginners, it is best to use VR to map out the main structure first, then refine the sketch manually before painting.

Freehand Sketching

If you are confident with drawing, you can sketch directly onto the wall using chalk, pencil or diluted paint.

This gives more freedom but requires stronger drawing skills.

Stencils or Tape

For simple shapes, patterns, lettering or geometric murals, stencils and painter’s tape can help create clean edges.

Choose the transfer method that suits your confidence level and the type of mural you are painting.

Step 6: Paint the Background First

When painting a mural, it usually helps to work from the background forward.

Start with large background areas, then gradually build up midground shapes, main subjects, details and final highlights.

This process helps you avoid painting small details too early and then accidentally covering them later.

For example, if you are painting a landscape mural, you might paint:

  • Sky or background colours
  • Distant shapes
  • Main objects
  • Shadows
  • Highlights
  • Fine details
  • Outlines or finishing touches

Working in layers keeps the process more organised and helps the mural develop naturally.

Step 7: Build Up Colours in Layers

Mural painting usually looks better when colour is built up in layers rather than trying to finish everything in one coat.

Some colours may need two or more coats to look solid, especially bright colours, yellows, reds or paints going over a darker base.

Let each layer dry before adding the next. This helps avoid muddy colours, streaks or uneven coverage.

For beginners, it is often easier to block in the main shapes first, then refine the mural gradually.

Do not worry if the mural looks rough during the early stages. Most murals go through an unfinished-looking stage before the details bring everything together.

Step 8: Add Details, Shadows and Highlights

Once the main colours and shapes are in place, you can begin adding details.

This might include outlines, textures, shadows, highlights, patterns, lettering or small features that make the mural feel finished.

Details should support the mural rather than overcrowd it. On large walls, too much small detail can get lost from a distance.

A good rule for beginners is to step back regularly and look at the mural from the normal viewing distance. This helps you see whether the artwork is balanced and readable.

Step 9: Let the Mural Dry Properly

After the mural is finished, allow it to dry properly before touching, cleaning or sealing it.

Drying time will depend on the paint type, weather, wall surface and how thickly the paint has been applied.

Outdoor murals may take longer to fully cure, especially in cooler or humid conditions.

Avoid painting in rain, extreme heat, heavy wind or on damp surfaces. Poor weather conditions can affect how the paint bonds and dries.

Step 10: Seal or Protect the Mural

Not every mural needs a clear coating, but outdoor murals, high-touch areas and public-facing walls often benefit from extra protection.

A protective coating can help defend the mural against UV exposure, weathering, dirt and graffiti.

For outdoor commercial or public murals, anti-graffiti coatings may be worth considering. These coatings can make future cleaning easier if the wall is tagged or marked.

Before applying any clear coat, make sure it is compatible with the paint you used. Some coatings can change the finish or colour of the artwork if applied incorrectly.

Common Beginner Mural Painting Mistakes

Beginner mural painters often run into the same problems.

Here are some common mistakes to avoid:

  • Starting without a clear design
  • Painting on a dirty or damaged wall
  • Skipping primer or base coat when needed
  • Using the wrong paint for the surface
  • Adding too much detail too early
  • Not stepping back to check the overall mural
  • Painting in poor weather conditions
  • Forgetting about access and safety
  • Not allowing enough drying time
  • Using a coating that is not compatible with the paint

Most of these problems can be avoided with proper planning and surface preparation.

Indoor vs Outdoor Murals

Indoor and outdoor murals have different requirements.

Indoor murals usually have more controlled conditions. You do not have to worry as much about rain, UV exposure or weather damage, but you still need to think about ventilation, floor protection and the type of wall paint being used.

Outdoor murals need to handle sunlight, moisture, temperature changes, dirt and public exposure. They usually require more careful surface preparation, exterior-grade materials and sometimes protective coatings.

If you are painting your first mural, an indoor wall is often easier to manage.

How Long Does It Take to Paint a Mural?

The time it takes to paint a mural depends on the size, detail level, surface condition and number of people painting.

A small simple mural might take a day or two. A larger detailed mural could take several days or weeks.

You also need to allow time for design, wall preparation, base coating, drying time and final protection.

For professional mural projects, the artwork itself is only one part of the process. Planning, concept development, site access, materials, safety and weather can all affect the timeline.

What Paint Should You Use for a Mural?

The best paint for a mural depends on the surface and location.

For indoor murals, quality acrylic paints, interior wall paints or low-odour water-based paints can work well.

For outdoor murals, choose exterior-grade paints designed to handle weather and UV exposure. Spray paint can also be used for murals, especially for graffiti art, street art and large-scale colour work.

Do not use cheap craft paint for large outdoor murals. It may fade, peel or break down faster than proper mural-grade materials.

When in doubt, choose paint designed for the surface you are painting.

Do You Need Permission to Paint a Mural?

Yes, in most cases you need permission before painting a mural on any wall you do not own.

For private walls, get permission from the property owner.

For public spaces, schools, businesses, strata buildings, council property or commercial sites, you may need formal approval before painting.

You may also need to consider:

Building ownership
Council rules
Strata approval
Public liability insurance
Working at heights
Copyright for reference images
Safety requirements
Access equipment
Neighbouring properties

Never paint a mural on public or private property without permission.

It is also worth understanding copyright rules for public art and reference images before using photos, logos or characters you did not create yourself.

When Should You Hire a Professional Mural Artist?

Painting your own mural can be a great creative project, especially for small indoor walls or simple designs.

But for larger, detailed, public-facing or commercial murals, hiring a professional mural artist is usually the better option.

A professional mural artist can help with design, scale, surface preparation, materials, safety, access and long-term durability.

This is especially important for:

Business murals
School murals
Public art murals
Council projects
Large exterior walls
Brand activations
Detailed realism
Murals requiring lifts or scaffolding
Walls needing anti-graffiti coatings

If the mural needs to represent a business, school or public space professionally, it is worth getting the artwork planned and painted properly.

Final Thoughts

Learning how to paint a mural is all about planning, preparation and patience.

Start with a clear design, choose the right wall, prepare the surface properly and build the artwork in stages. A mural does not need to be highly detailed to be effective. Simple shapes, strong colours and a well-planned design can still create a powerful result.

For beginners, start small and build confidence before attempting large or complex walls.

If you are planning a mural for a school, business, home or public space and want a professional result, Blackbook Ink can help with concept design, mural painting, graffiti art, street art and large-scale wall artwork across Sydney and Australia.

Get a Quote for a Mural

FAQs About Painting a Mural

Start by choosing a suitable wall, creating a simple design, preparing the surface, applying a base coat, transferring your design and painting the mural in layers. Beginners should start with large shapes and simple colours before adding smaller details.

For indoor murals, acrylic paint or quality interior wall paint can work well. For outdoor murals, use exterior-grade paint or professional spray paint designed for outdoor conditions. The best paint depends on the surface, location and finish you want.

In many cases, yes. Primer helps paint bond to the surface and creates a more even base. Bare brick, concrete, render, timber or patchy walls usually benefit from primer or a base coat before mural painting.

Yes. You can use the grid method, doodle grid, VR Headset, freehand sketching, stencils, painter’s tape or chalk outlines to transfer your design onto the wall without a projector.

A small simple mural may take a day or two, while larger or more detailed murals can take several days or longer. Design time, surface preparation, drying time, access and weather can all affect the timeline.

Outdoor murals, public-facing walls and high-touch areas often benefit from a protective clear coat or anti-graffiti coating. Indoor murals may not need sealing unless they are in a high-use area.

Do Murals Reduce Graffiti? What Actually Works

Vibrant street art mural featuring a futuristic female figure with cosmic background.

Graffiti and vandalism are ongoing issues for many businesses, councils, and property owners. Blank walls often become repeated targets, leading to ongoing maintenance costs and a constant cycle of repainting.


One question that comes up regularly is: do murals reduce graffiti?


The short answer is yes — but only when done correctly.


In fact, one of the lesser-known benefits of murals is their ability to deter tagging and improve how a space is treated over the long term.
Read more about the broader benefits of murals


Why Blank Walls Attract Graffiti

https://images.openai.com/static-rsc-4/iwBvN9C7pzBPdnTJkNSXJrI5Ggsixa4CQI3DaBtTeRwBE5wPlN9A6Pmm0G9GYeTy4Fz4NcglFgApgq8P-w1ZBYR5zcw7fWbcnd3ZsAIWjyQ2wHyiFy9zqZjuYQEVb2e5xNeqzYObIKhZZTJQh6kGwEth-MNfCYft5n052unNSM28W_xJ3Z0W241S4tya9eoD?purpose=fullsize
 

To understand whether murals work, it helps to understand why graffiti happens in the first place.

Blank walls are:

  • Highly visible
  • Easy to access
  • Seen as “unused space”

For graffiti writers, these surfaces become prime locations to leave a mark — especially in high-traffic areas.

Once tagging starts, it often escalates:

  • One tag leads to more
  • Surfaces become layered with graffiti
  • Maintenance becomes ongoing

Do Murals Reduce Graffiti? The Reality

https://images.openai.com/static-rsc-4/E-44LIjtYOF3sp1j9o-mpaSBX_G-8pr9S5QxPN9tjeRSIndiCv9lPEe9BOBcyEatYCiPOQYMOJpOVjJDYt__WCjV9vPNe-L-x4ajmDP161o7BDLkx6vhfadLprEX7e8sUbUV_ptVUNxanPdeHGMx1Zh5iOdo_lIpmV9IXeUF3yCxSN3IyqcFze5KU7510DsO?purpose=fullsize

So, do murals reduce graffiti?

 In most cases, yes significantly.

High-quality murals often deter tagging because:

  • They command respect within graffiti culture if represented by a respected artist from the graffiti scene.
  • Artists are less likely to paint over detailed work
  • The wall is no longer seen as “available space”

This creates a psychological shift:
From a blank canvas → to a completed artwork

Why Murals Work Better Than Constant Repainting

Many property owners rely on:

  • Painting over graffiti
  • Applying basic coatings
  • Regular maintenance

The problem is:
These solutions don’t address the root cause

Repainting a wall simply resets it back to a blank surface, making it an easy target again.

Murals, on the other hand:

  • Change how the wall is perceived
  • Add value to the space
  • Reduce the likelihood of repeat vandalism

Explore how this approach fits into
graffiti art & mural solutions

Real Case Study: Anti-Graffiti Mural in Sydney

 
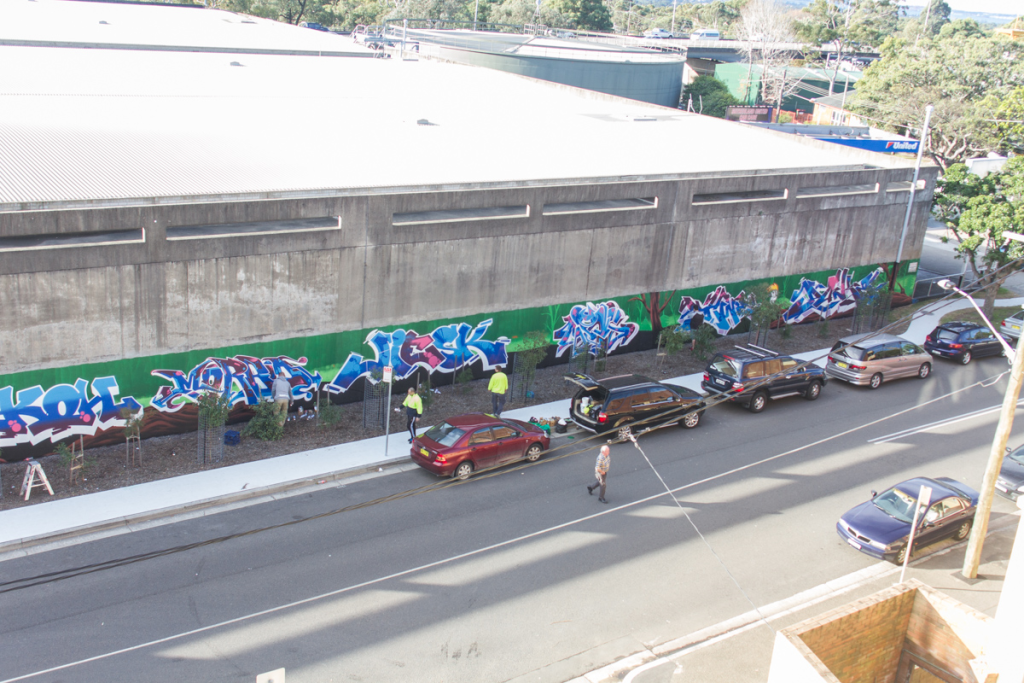
anti graffiti mural sydney water sutherland


A strong example of this approach comes from a project completed for Sydney Water in Sutherland.

The site:

  • A 100-metre wall along a rail corridor
  • Repeatedly targeted with graffiti
  • Constant maintenance issue

The solution:

Instead of continuing to repaint the wall, a different approach was taken.

A team of 11 graffiti artists was brought together to create a cohesive mural, including:

  • Large-scale graffiti lettering
  • Character artwork
  • A unified background across the entire wall

The entire piece was colour-matched and designed as one continuous mural.

The result:

  • The wall stopped being targeted
  • Positive feedback from the community
  • Long-term reduction in maintenance

 Even years later, the wall remains largely free of tagging.

Explore case study of this Anti Graffiti Mural

What Makes an Anti-Graffiti Mural Effective

Not all murals prevent graffiti. The execution matters.

Effective murals typically include:

✔ High-quality artwork

Detailed, professional murals are less likely to be tagged over.

✔ Strong visual coverage

Filling the entire wall removes “empty space” that invites tagging.

✔ Graffiti-informed design

Understanding graffiti culture helps create work that is respected.

✔ Cohesive composition

A unified mural is more effective than fragmented pieces.

Where This Works Best

Murals are especially effective for:

  • Commercial buildings
  • Council infrastructure
  • Schools and public spaces
  • High-traffic urban areas

See how murals are used across different sectors:

Murals as a Long-Term Solution in Sydney

In areas across Sydney, murals are increasingly being used as a proactive solution to graffiti.

Rather than reacting to vandalism, property owners are:

  • Investing in long-term visual upgrades
  • Improving how spaces are perceived
  • Reducing ongoing costs

Learn more about
Sydney mural projects

With proper materials and coatings, murals can last for many years while maintaining their effectiveness.

Looking for a Long-Term Graffiti Solution?

If you’re dealing with repeated graffiti issues, a mural may be a more effective long-term solution than constant repainting.

Get a Quote Today

Or learn more about:

How to Book an Artist for a Mural: A Step-by-Step Guide

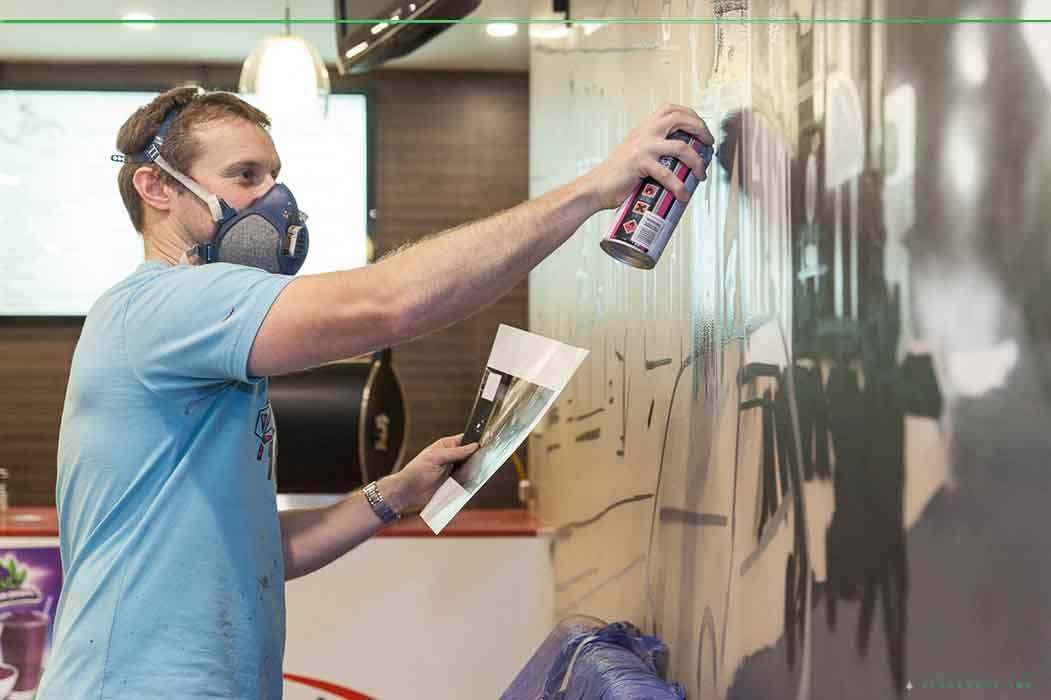
Artist spray painting a mural at Jp's Espresso Cafe in Revesby NSW.

If you’re looking to book an artist for a mural, you’re embarking on an exciting journey to transform a blank wall into a vibrant masterpiece. Whether it’s for your home, business, or community space, hiring the right muralist requires careful planning and execution. This guide will walk you through the process of booking an artist for a mural, ensuring your project is a success.

1. Define Your Vision and Goals


Before you book an artist for a mural, it’s essential to have a clear vision of what you want. Ask yourself:


    • What is the purpose of the mural? (e.g., branding, community engagement, personal expression)
    • What style or theme are you looking for? (e.g., abstract, realistic, graffiti, cultural)
    • Where will the mural be located? (indoor, outdoor, size, surface type)
    • What is your budget and timeline?


Having a well-defined vision will help you communicate your needs effectively when you reach out to artists.

Colorful flamingo mural painted on brick wall by Blackbook Ink in Australia.

2. Research and Find the Right Artist

To book an artist for a mural, you need to find someone whose style and experience align with your vision. Here’s how:

  • Search Online: Use platforms like Instagram, Behance, or Pinterest to discover mural artists. Use keywords like “mural artist near me” or “hire mural artist” to narrow your search.


  • Check Portfolios: Look for artists with a strong portfolio of previous work. Pay attention to their style, quality, and versatility.


  • Read Reviews: If the artist has worked on commercial or community projects, check for testimonials or reviews.


  • Local Art Scenes: Visit local galleries, art fairs, or street art festivals to find talented muralists in your area.

3. Reach Out and Discuss Your Project


Once you’ve identified a few artists, it’s time to book an artist for a mural by initiating contact. Here’s what to include in your initial inquiry:


    • A brief description of your project (location, size, theme, and timeline).
    • Your budget range (if possible).
    • Reference images or inspiration for the mural.
    • Ask about their availability and process.


Many artists will provide a consultation to discuss your ideas in detail and offer their creative input.

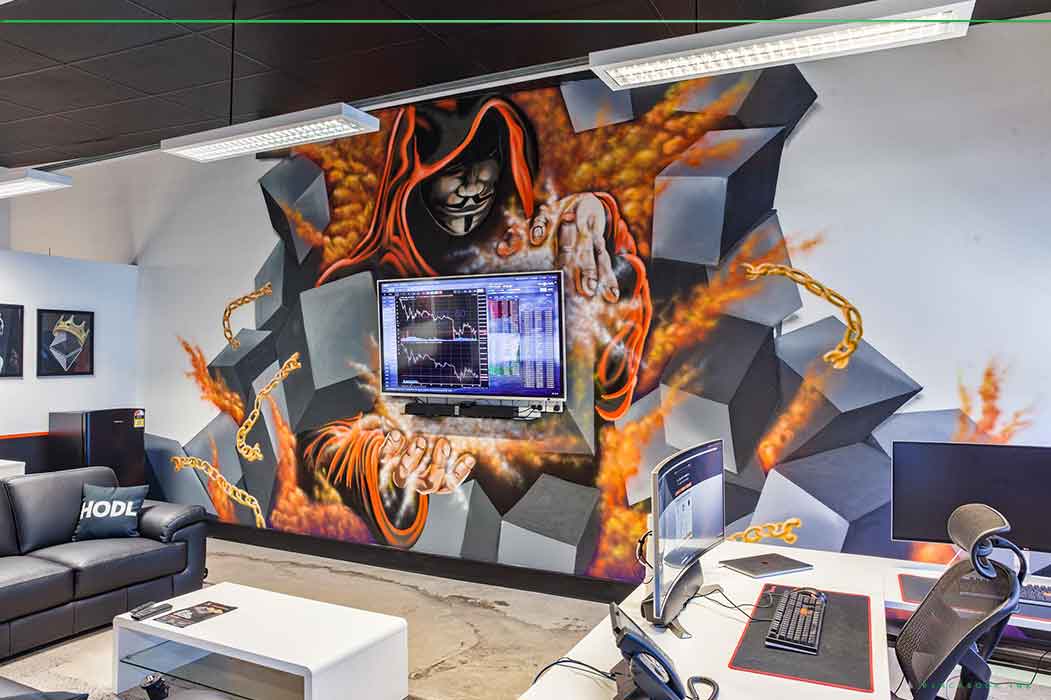
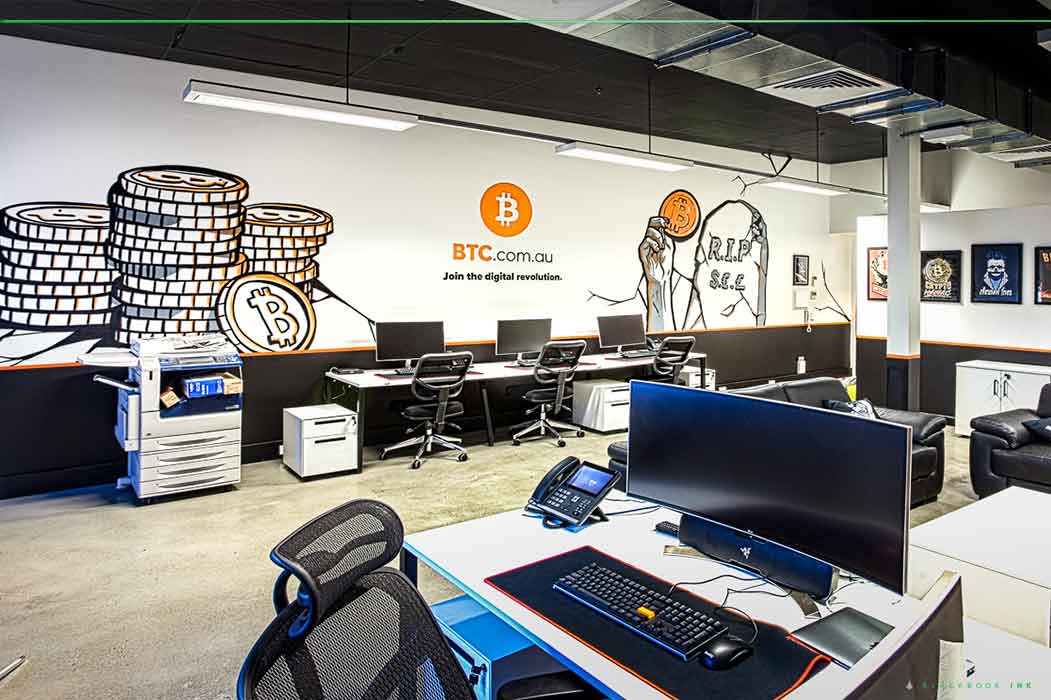
Modern corporate office featuring Bitcoin mural and workstations in Sydney.

4. Review Proposals and Quotes

After discussing your project, the artist will likely provide a proposal or quote. This should include:

  • A concept sketch or design idea.


  • A breakdown of costs (materials, labour, travel, etc.).


  • A timeline for completion.


  • Terms and conditions (e.g., payment schedule, revisions).


Take your time to review the proposal and ensure it aligns with your vision and budget. Don’t hesitate to ask questions or request adjustments.

5. Finalize the Agreement

Once you’re satisfied with the proposal, it’s time to book an artist for a mural officially. This involves:

  • Signing a contract that outlines the scope of work, payment terms, timeline, and ownership rights.


  • Paying a deposit (typically 30-50% of the total cost) to secure the artist’s services.


  • Confirming the start date and any logistical details (e.g., wall preparation, permits for public spaces).

6. Prepare the Space


Before the artist begins, ensure the wall or surface is ready:


    • Clean and prime the surface if necessary.
    • Obtain any required permits or permissions (especially for public or commercial spaces).
    • Provide the artist with access to the site and any necessary equipment (e.g., scaffolding, lighting).
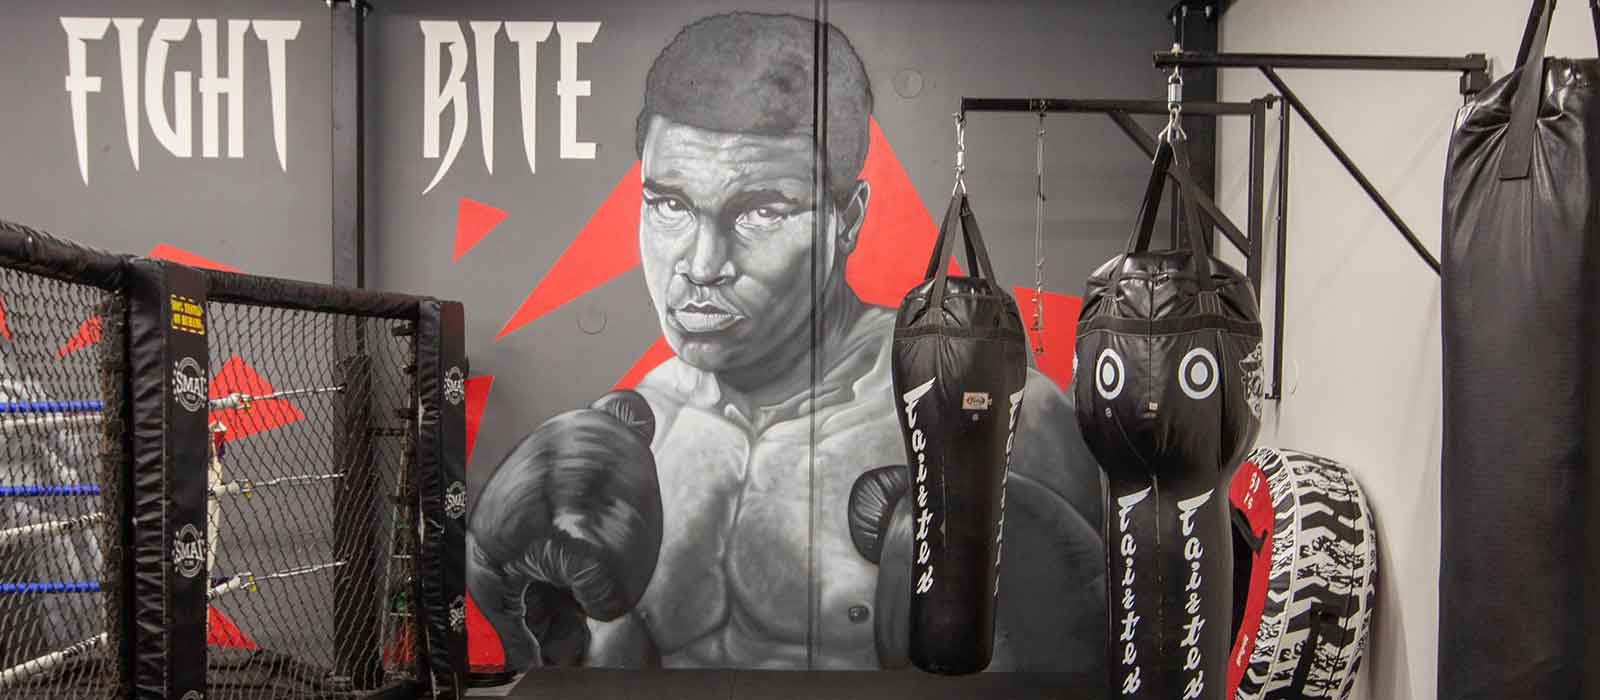
Boxing gym with mural of a boxer and training equipment at Blackbook Ink.

7. Monitor Progress and Provide Feedback


While the artist works on the mural, maintain open communication:


    • Check in periodically to see the progress.
    • Provide constructive feedback if needed (respecting the artist’s creative process).
    • Address any issues or concerns promptly.
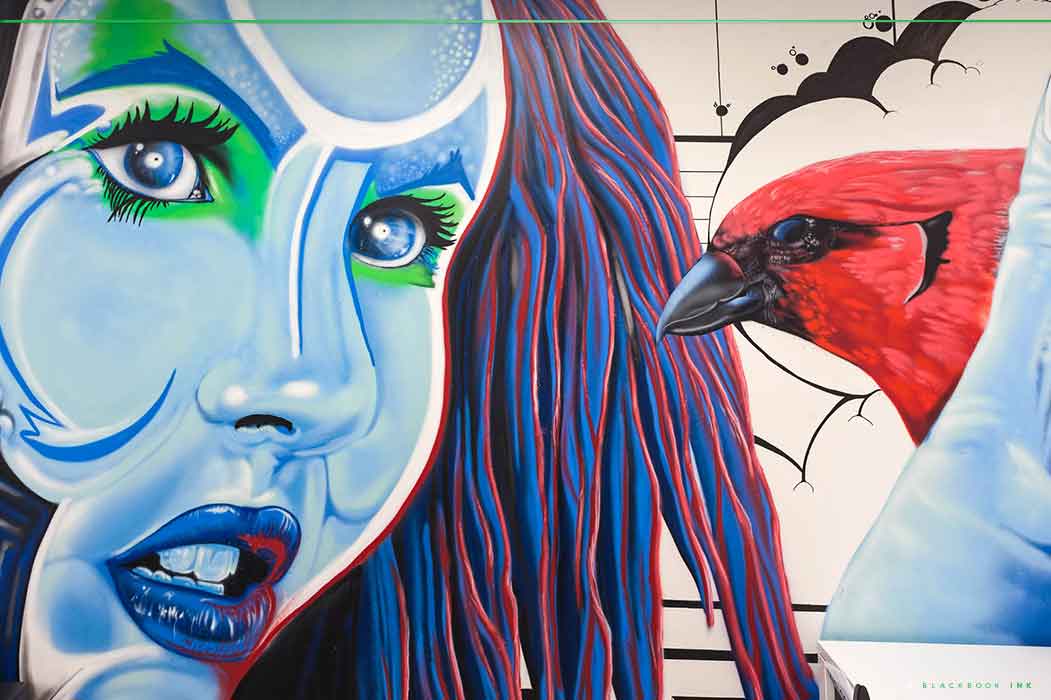
Colorful mural featuring a woman's face and a bird at Blackbook Ink.

8. Celebrate and Share the Finished Mural


Once the mural is complete, take the time to appreciate the artist’s hard work:


    • Finalize payment as per the agreement.
    • Share the mural on social media and tag the artist to give them credit.
    • Consider hosting an unveiling event to showcase the artwork to your community or customers.

Why Book an Artist for a Mural?


Booking a professional artist for a mural offers numerous benefits:


    • Unique Artwork: A custom mural adds personality and character to any space.
    • Enhanced Aesthetics: Murals can transform dull walls into eye-catching focal points.
    • Community Engagement: Public murals often become landmarks that inspire and unite people.
    • Brand Identity: For businesses, murals can reinforce branding and attract customers.

Conclusion


Learning how to book an artist for a mural is a rewarding process that requires careful planning and collaboration. By defining your vision, researching artists, and communicating effectively, you can bring your mural project to life. Whether it’s for personal enjoyment, business branding, or community enrichment, a well-executed mural is an investment in creativity and culture.


Ready to book an artist for a mural? Start your search today and turn your walls into works of art!

Painted Murals vs. Vinyl Murals : Choosing the Right Option for You

Colourful mural featuring birds, flowers, and Sydney Harbour Bridge at Blackbook Ink.

If you’re looking to enhance the visual appeal of your space, whether it’s a school, business, or community facility, murals offer an impactful way to achieve this. But when it comes to murals, you have two main options: hand-painted murals or vinyl murals.

Each option has its own advantages and disadvantages, but if you’re looking for longevity, creative flexibility, and durability, painted murals are the superior choice. Below, we explore the key differences, advantages, and disadvantages of each approach to help you make an informed decision.


A painted mural is a hand-crafted artwork created directly on the wall using high-quality paints. These murals are typically created by skilled artists who tailor the design to the space, allowing for complete customization. Painted murals can be created on indoor or outdoor walls and are often sealed to withstand weather and vandalism.


Vinyl murals are printed graphics applied to walls using adhesive backing. The design is created digitally, printed onto vinyl material, and then attached to the wall. While they can offer a faster and cheaper solution, vinyl murals are limited in durability and design flexibility.


When done properly, painted murals last for many years, even in outdoor environments. Weather-resistant paints and protective sealants ensure that the mural stays vibrant and intact for the long term. This makes painted murals a cost-effective investment as they require minimal maintenance over time.

Painted murals can be coated with anti-graffiti sealants, making it easy to clean off unwanted tags or scribbles without damaging the artwork. This feature is especially useful for schools, public spaces, and high-traffic areas.

Unlike vinyl, painted murals blend perfectly with the architectural features of a wall. Vents, pipes, and uneven surfaces are no obstacle for a skilled muralist, who can incorporate these elements into the design. This leads to a more immersive and polished final look.

Unlike vinyl murals, which require a smooth, clean surface, painted murals can be created on virtually any wall. Even rough-textured or weathered walls can be transformed into a smooth, cohesive canvas for a mural.

Every painted mural is a one-of-a-kind artwork designed specifically for the space it occupies. This allows for full creative freedom to develop concepts that reflect school values, brand identity, or the character of a space. Vinyl murals, on the other hand, are limited by the constraints of digital design and printing.


Painted murals require the expertise of a skilled artist, which means they may have a higher initial cost than vinyl murals. However, the superior longevity and minimal maintenance costs make painted murals more cost-effective in the long term.

Hand-painted murals take time to complete as they require surface preparation, sketching, painting, and sealing. This contrasts with vinyl murals, which can be printed and installed quickly. However, if longevity is a priority, the extra time investment is worth it.


Once the design is ready, vinyl murals can be printed and applied quickly. This makes them suitable for projects with tight deadlines or events that require temporary graphics.

Vinyl murals are cheaper upfront compared to painted murals. This is due to the lower cost of materials and the ability to mass-produce them using printers.

Vinyl murals can be removed without causing permanent damage to the wall, making them ideal for rented spaces or temporary displays. However, removal can sometimes leave behind adhesive residue (more on that later).


Vinyl murals are fragile and prone to damage from curious hands, scuffs, and scratches. In areas with high foot traffic or in environments with children, vinyl murals often get peeled, scratched, or torn.

Moisture is one of vinyl’s biggest weaknesses. If the wall is prone to dampness or condensation, the adhesive backing can loosen, causing bubbles, warping, or complete detachment of the mural. This makes them unsuitable for areas like bathrooms, kitchens, or outdoor spaces.

If left on a wall for too long, vinyl murals can bond with the paint. When removed, they often pull chunks of paint with them, resulting in unsightly patches that require wall repair.

Prolonged exposure to sunlight can cause vinyl murals to fade or yellow. The colours are also more prone to distortion under extreme heat, unlike UV-resistant painted murals that are designed to maintain colour vibrancy over time.

Vinyl murals often leave behind adhesive residue after removal. This residue can be challenging to clean and may require solvents or wall repainting to fully remove.

When exposed to sunlight or fluctuating temperatures, vinyl can shrink, bubble, or peel away from the wall. This not only affects its appearance but may require costly re-application or repair.

Since vinyl sticks directly to the wall, any texture, bump, or crack beneath it will be visible. This can make the mural look uneven or unprofessional. Painted murals, on the other hand, create a smooth finish, as the paint becomes one with the surface.

The longer a vinyl mural stays on a wall, the harder it is to remove. Over time, the adhesive bonds more strongly to the wall, making it difficult to peel off without tearing the vinyl into small pieces. This process can be time-consuming and labour-intensive.


If you need a mural that lasts, looks vibrant, and integrates seamlessly with your space, the answer is clear: painted murals are the better choice.

  • You want a long-lasting solution.
  • You want to create a completely custom, one-of-a-kind design.
  • You need the mural to work around pipes, vents, or uneven wall surfaces.
  • You want to avoid peeling, bubbling, or fading over time.
  • The wall may be subject to moisture, humidity, or graffiti.
  • You need a temporary solution for a short-term campaign or event.
  • You want something that can be removed quickly.
  • You’re looking for an initial low-cost option (but not necessarily the most cost-effective long-term).


At Blackbook Ink, we believe in creating murals that stand the test of time. Our hand-painted murals are crafted with weather-resistant paints, high-impact designs, and anti-graffiti coatings that make them durable and easy to maintain. Whether it’s a school, community centre, or commercial space, we design every mural with the environment, audience, and message in mind.

Unlike vinyl murals, our painted murals offer:
Longevity: Our murals last for years — indoors and outdoors.
Bespoke Design: Every mural is tailored to your vision.
Seamless Integration: Our murals work with your space, not against it.
Eco-Friendly Options: We use low-VOC, environmentally friendly paints.
Durability: Our murals resist damage from UV rays, weather, and graffiti.


If you’re looking to create an artwork that tells a story, reflects your values, and stands the test of time, a hand-painted mural is the way to go. Our team at Blackbook Ink is ready to bring your vision to life with customized, site-specific designs.

Get in touch with us today!

Don’t settle for something temporary. Choose something timeless. Choose a painted mural by Blackbook Ink.


The Importance of UV Coatings for Murals

Artist applying UV coating to protect mural artwork.

Murals have become a popular form of artistic expression, adding vibrancy and character to cities around the world. However, protecting these murals from the damaging effects of UV rays and graffiti vandalism is crucial to ensure their longevity and beauty. In this article, we will explore the importance of UV and graffiti coatings for murals, and how they can preserve these works of art for years to come.


The Impact of UV Rays on Murals


UV rays from the sun can cause significant damage to murals over time. The constant exposure to sunlight can fade the vibrant colours, causing them to lose their original brilliance. Additionally, UV rays can break down the binders in the paint, leading to cracking and peeling. To protect murals from these harmful effects, the application of UV coatings is essential.


UV Coatings for Murals


UV coatings act as a barrier between the mural and the sun’s harmful rays. These coatings contain special additives that absorb the UV light, preventing it from reaching the paint and causing damage. The UV coatings can be applied as a clear layer over the mural, preserving the colours and preventing fading. They are available in both gloss and matte finishes, allowing artists to choose the desired aesthetic for their murals.


Benefits of UV Coatings


The application of UV coatings offers several benefits for murals:


    1. Colour Preservation: UV coatings protect the colours of the mural from fading, allowing them to retain their vibrancy and visual impact over time.
    2. Longevity: By shielding the paint from UV rays, these coatings extend the lifespan of the mural, ensuring that it remains intact for years to come.
    3. Protection Against Cracking and Peeling: UV coatings help prevent the breakdown of binders in the paint, reducing the risk of cracking and peeling.
    4. Easy Maintenance: The application of UV coatings makes murals easier to clean and maintain, as the protective layer prevents dirt and pollutants from penetrating the paint.


The Threat of Graffiti Vandalism


While murals add beauty to urban environments, they are also vulnerable to graffiti vandalism. Unwanted graffiti not only defaces the artwork but also undermines the efforts of the artists and the community. Removing graffiti can be a costly and time-consuming process, making preventative measures essential.


Understanding Graffiti Coatings


Graffiti coatings, also known as anti-graffiti coatings, are specially formulated products designed to protect surfaces from graffiti vandalism. These coatings create a barrier that makes it difficult for graffiti to adhere to the surface, making removal easier and more effective. There are different types of graffiti coatings available, each with its own unique properties and benefits.


Sacrificial Anti-Graffiti Coatings


Sacrificial anti-graffiti coatings are often used in areas where graffiti vandalism is less frequent. These coatings are typically polymer or wax-based and require reapplication after graffiti removal. They provide a matte finish, making them invisible on the surface. Sacrificial coatings can be applied using a roller, brush, or spray equipment, and are best cleaned with a hot water pressure wash.


Permanent Anti-Graffiti Paints


Permanent anti-graffiti paints offer long-term protection against graffiti vandalism. These paints contain silicone and are available in both matte and gloss finishes. They can repel various types of graffiti media and provide graffiti protection for at least ten years. Depending on the manufacturer, these paints may last for ten to fifty cleaning operations before reapplication is necessary. They are suitable for concrete, painted surfaces, stone, and brick, making them versatile for different mural substrates.


Fluoropolymer-based Anti-Graffiti Coatings


Fluoropolymer-based anti-graffiti coatings offer the highest level of protection against graffiti vandalism. These coatings create a low surface energy shield over the substrate, making it difficult for graffiti to adhere. They provide long-lasting anti-graffiti effects, with the ability to withstand numerous cleanings throughout their lifespan. Fluoropolymer-based coatings are approved for government use and are commonly used in subways, trains, railway bridges, and other high-traffic areas.


The Importance of Graffiti Coatings for Murals


Applying graffiti coatings to murals offers several advantages:


    1. Protection against Vandalism: Graffiti coatings act as a deterrent, making it more difficult for vandals to deface murals. The smooth surface created by the coatings can discourage graffiti artists from targeting the artwork.
    2. Easy Removal: When graffiti does occur, the presence of graffiti coatings makes removal easier and more effective. The coatings prevent the graffiti from bonding tightly to the surface, allowing for faster and cleaner removal without leaving behind stains or shadows.
    3. Cost and Time Savings: By reducing the time and effort required for graffiti removal, coatings save both money and resources. Cities and communities can allocate their resources to other important projects instead of constantly dealing with graffiti clean up.
    4. Preserving the Original Artwork: Graffiti coatings help preserve the integrity of the original mural by preventing unwanted graffiti from permanently altering or obscuring the artist’s vision.


Choosing the Right Coating for Murals


When selecting UV and graffiti coatings for murals, it is important to consider factors such as the substrate, desired aesthetic, and level of graffiti vandalism in the area. Consulting with experts and manufacturers can help determine the most suitable coating for a specific mural project.


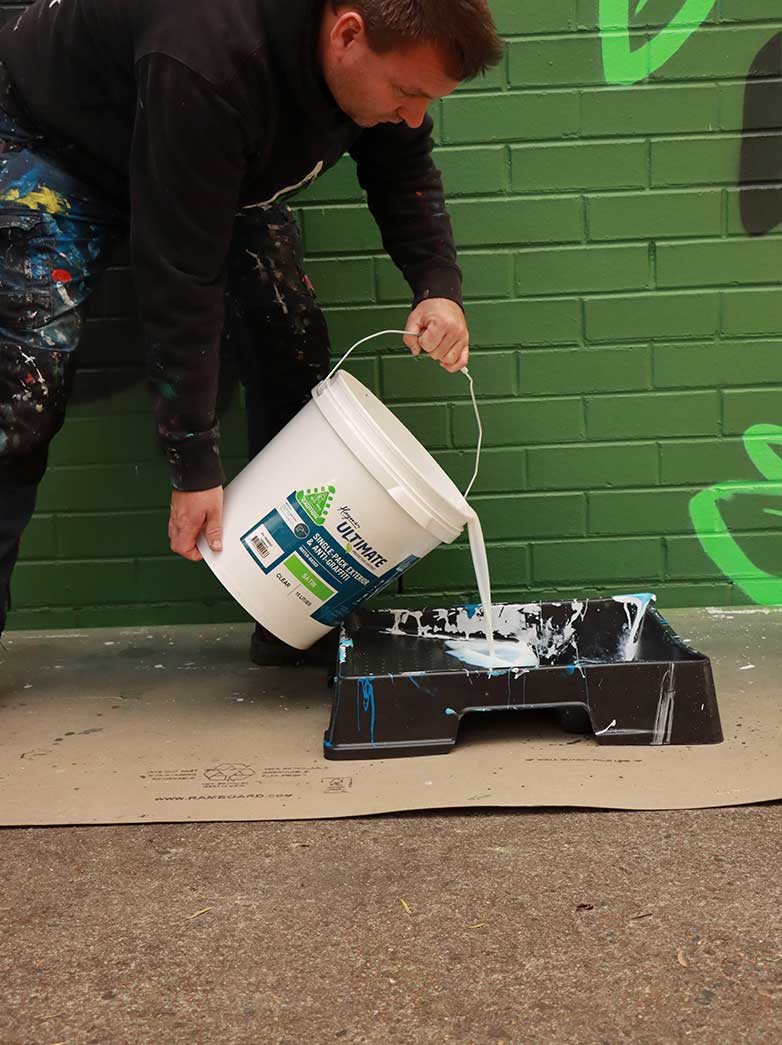
For sacrificial anti-graffiti coatings, Haymes Single Pack Anti-Graffiti is a recommended option. It provides temporary protection and can be easily reapplied after graffiti removal.


For long-term protection, Resene Graffitishield and Elco International Adcoat Tuff Coat are two-pack coatings that offer durability and resistance against graffiti vandalism.


Conclusion


UV and graffiti coatings play a vital role in preserving the beauty and integrity of murals. UV coatings protect against the damaging effects of sunlight, while graffiti coatings deter vandalism and simplify the removal process. By investing in these coatings, cities and communities can ensure that their murals remain vibrant, attractive, and free from unwanted defacement. Choosing the right coatings and implementing preventive measures will contribute to the long-term sustainability of these artistic expressions for everyone to enjoy.


Benefits of Murals

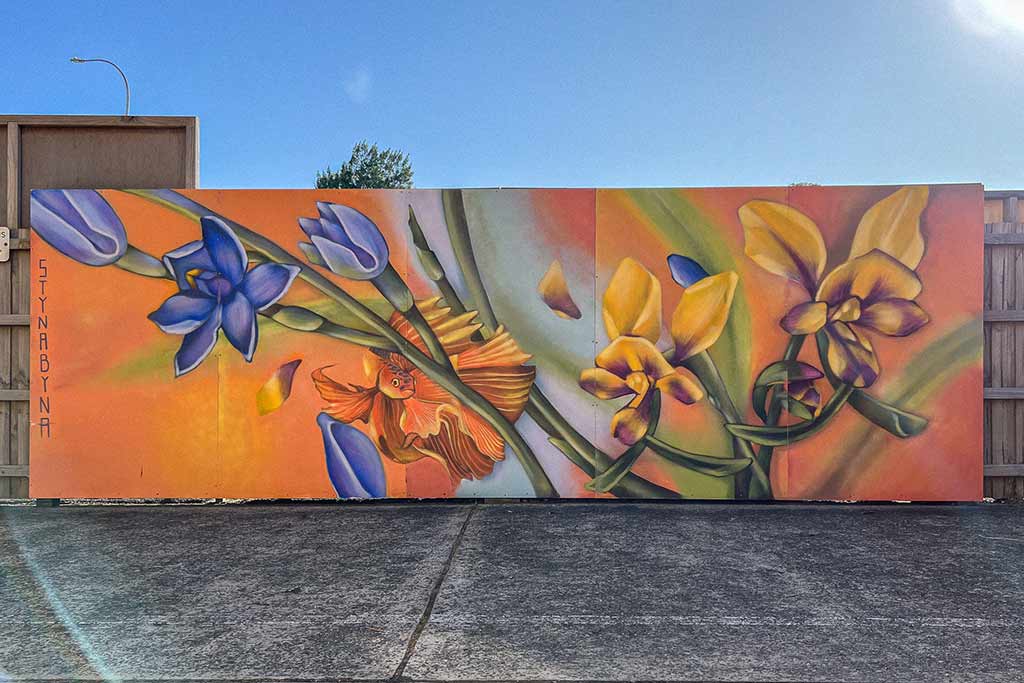
Colorful mural of blue and yellow flowers at Blackbook Ink tattoo studio.

Why Invest in Street Art & Murals?

Street art and murals have evolved far beyond their early perception as something temporary or controversial. Today, they are recognised as a powerful tool for transforming spaces, engaging communities, and adding long-term value.

Across Australia, businesses, councils, and schools are increasingly investing in mural art  not just for aesthetics, but for measurable results.

If you’re considering a mural, understanding the real benefits can help you make the right decision.

Murals Transform Spaces Instantly

A professionally designed mural can completely change how a space is experienced.

Instead of blank or ageing walls, murals create a strong visual identity that draws attention and adds character.

For businesses, this often leads to:

  • Increased foot traffic
  • Stronger brand recognition
  • More social media engagement

If you’re looking to transform your space, explore our custom mural services

Proven Economic & Community Impact

Research into urban development shows that public art contributes to economic growth and stronger communities.

A study by Chanuki Seresinhe found that areas with more artistic activity often experience:

  • Increased property values
  • Growth in local businesses
  • Higher community engagement

This is one of the reasons governments and councils invest heavily in mural programs.

See how this applies locally through our community murals & public art projects

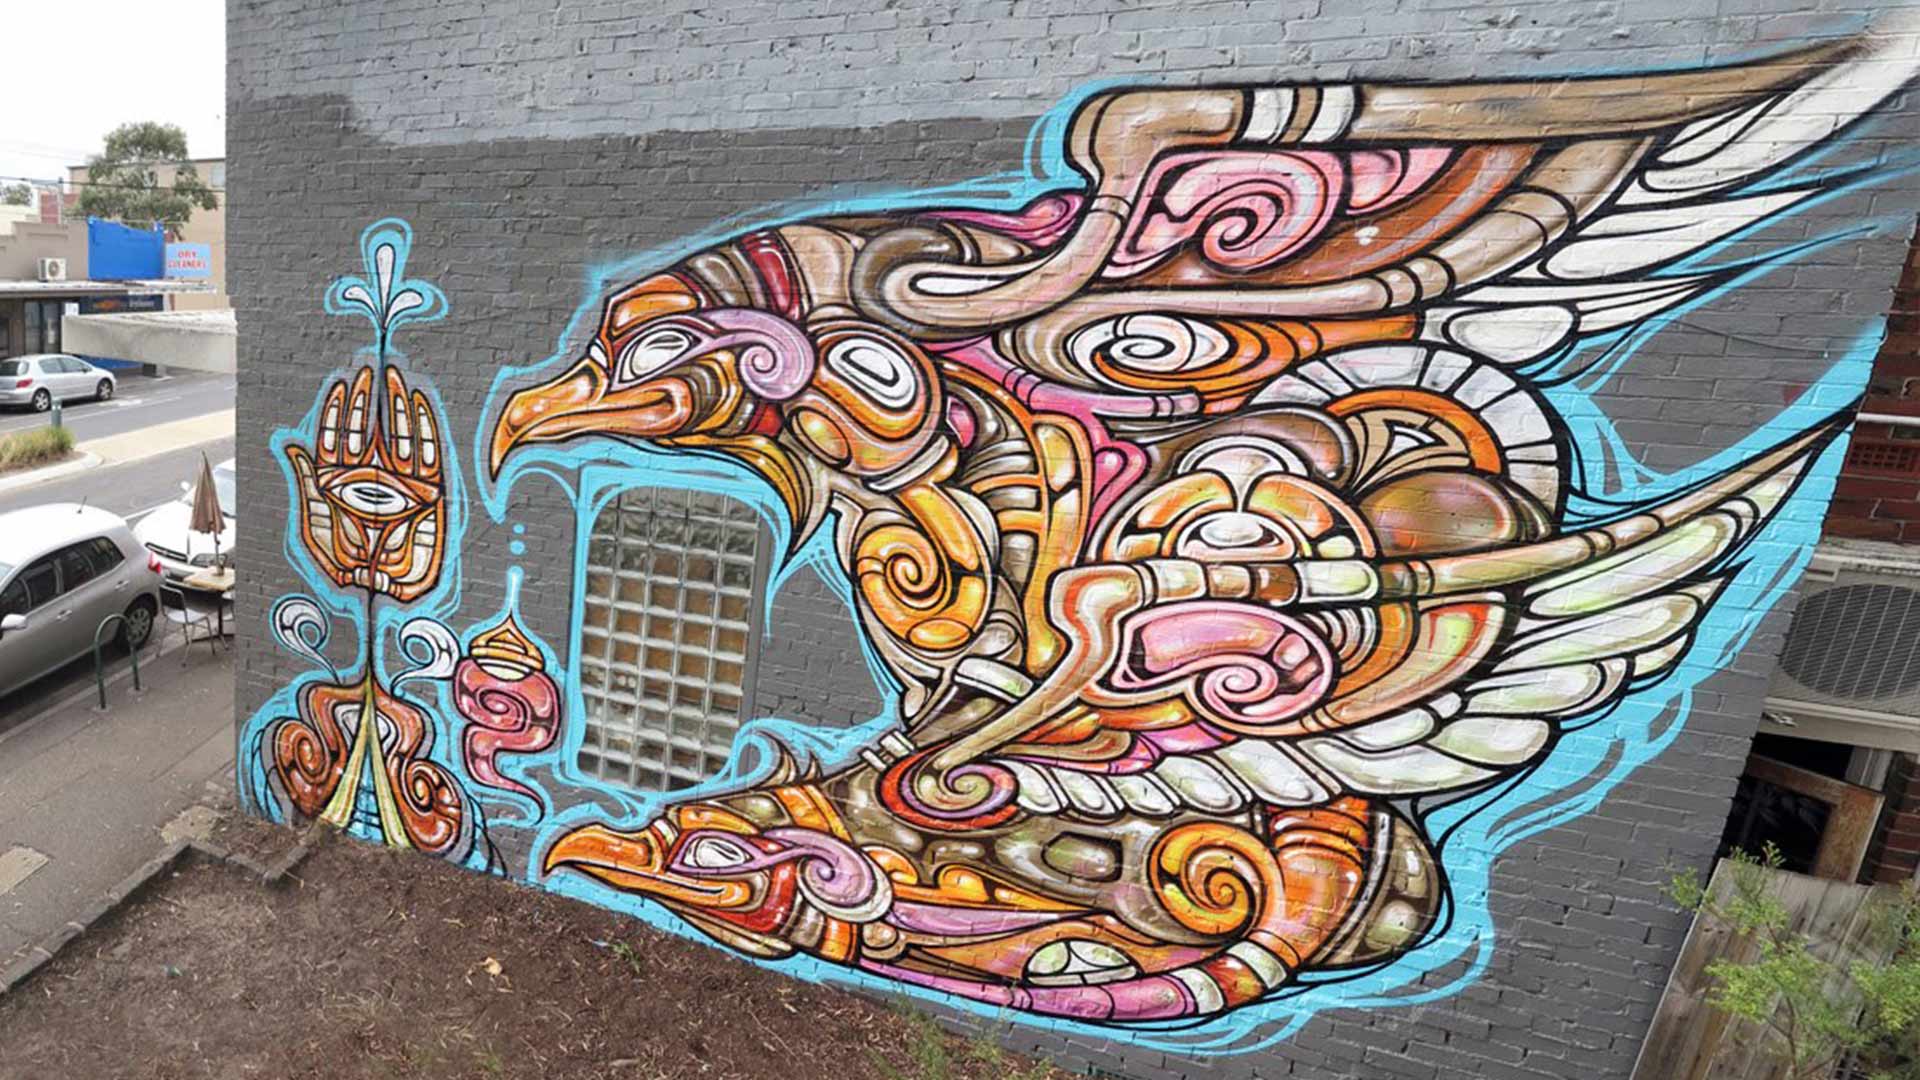
Colorful mural of an eagle with intricate patterns at Blackbook Ink.

Real Example – Sydney’s Street Art Programs

A strong example is the Perfect Match Program Marrickville.

This initiative connects artists with property owners to create murals across Sydney’s Inner West.

The results include:

  • Increased tourism and foot traffic
  • Cultural activation of local areas
  • Ongoing economic benefits

View similar outcomes in our public art case studies

Murals Help Reduce Graffiti & Vandalism

One of the most overlooked benefits of murals is their ability to deter graffiti.

High-quality, respected artwork often:

  • Discourages tagging
  • Improves how the space is treated
  • Reduces ongoing maintenance costs

Learn more about this approach in our graffiti art & mural solutions

Real Example – Anti-Graffiti Mural in Sydney

We worked on a 100m wall project in Sutherland for Sydney Water that had ongoing vandalism issues.

By bringing together a team of graffiti artists to create a cohesive mural, the wall was transformed into a respected artwork.

 The result:

  • No ongoing tagging
  • Positive community feedback
  • Long-term cost savings

 Read the full case study:
Anti-Graffiti Mural Project in Sydney

Man cleaning graffiti on wall with spray paint removal tools.

Long-Term Value for Businesses

Murals are more than decoration — they’re a long-term business asset.

They can:

  • Reinforce brand identity
  • Create shareable customer experiences
  • Improve the overall environment

See how this applies to commercial spaces: corporate mural projects

Case Study – Hospitality & Brand Experience

Murals are widely used in hospitality venues to create standout environments that customers want to photograph and share.

From restaurants to gyms and retail spaces, murals help turn blank walls into branded experiences.

View examples:
Corporate & Commercial Mural Projects

Case Study – School Murals & Student Engagement

Murals in schools go beyond aesthetics — they help create identity, pride, and engagement among students.

Explore:
School mural projects

Why More Clients Are Investing in Murals

There’s been a clear shift across industries.

Businesses want spaces that stand out.
Schools want environments that engage students.
Councils want projects that activate communities.

Murals bring all of this together — combining art, branding, and placemaking.

If you’re based locally, see how we deliver projects across Sydney mural projects

Working with Professional Mural Artists

At Blackbook Ink, we’ve delivered hundreds of murals across Australia for:

  • Schools
  • Councils
  • Commercial businesses
  • Developers

Each project is designed specifically for the space, audience, and purpose.

Learn more about our mural process and what’s involved from concept to completion.

Thinking About a Mural for Your Space?

If you’re considering a mural, the right approach can make a significant long-term impact.

Get a Quote Today

Or explore: